Publications
 Partners


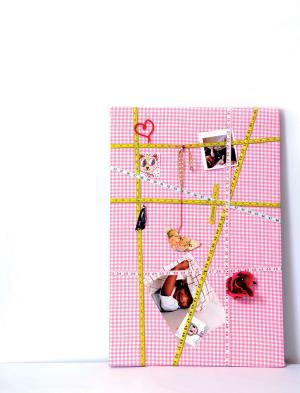
Pin it up
Difficulty rating: ****
Time to prepare: ***
Cleaning up: **
Activity time: It depends entirely on your DIY skills but roughly 40 minutes to one hour.
You will need:
- A wooden frame or piece of styrofoam
- Fabric of your choice
- Staple gun or thumbnails
- Measuring tape
- Pretty pins or thumbnails for decoration
Step #1
- Stretch the fabric over the wooden frame or styrofoam.
- Use the staple gun or thumbnails to secure it in position on the back of the board.
Step #2
- Secure the measuring tape across the width and length of the board.
- First secure one end with a staple or thumbnail on the back of the board.
- Stretch the measuring tape over the front of the board and secure on the other side.
- Before punching in the staple, make sure that the measuring tape is loose enough to slip a picture between ut and the board but tight enough for the picture not to fall out.
Step #3
- Use pretty pins or thumbnails as decorations.
- Secure them in the areas where the measuring tapes overlap.
Step #4
- Pin your favourite photos, inspirational messages or child's art.
TIP!!!
Display your child's art on your noticeboard. It will make her feel special and give her the confidence to be creative.